David's RV-10 Build

Just another RV-10 builders log

Category: Tools

Skin dimpling

I started off today by creating a new way to dimple the skins. While my old setup was easy. It was very awkward to use on large skins. It was also mounted on top of a table adding some significant height to the overall work. What I did today was I found a 2×6 board just long enough to mount the DRDT2 too, and then took one of remaining sides of the crate that are still out back and cut 4 lengths at 2′ long. Then using very scientific methods, we attached 2 to each table. This allows me to slide the DRdT2 in between the tables and creates a flat surface for the skin to slide on. I really wish I did this a year ago.

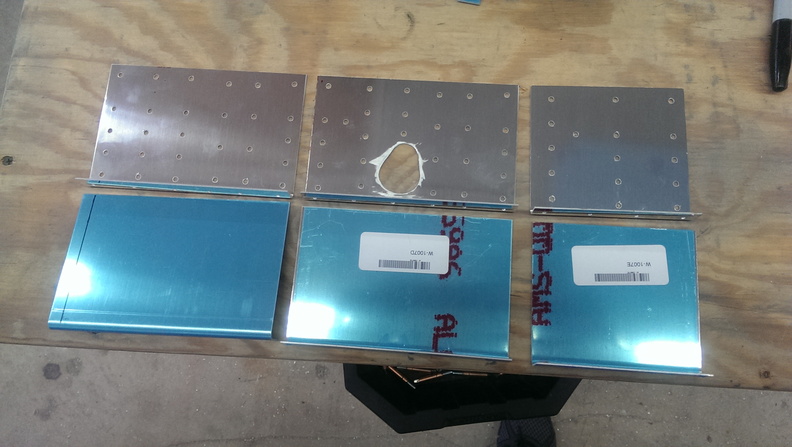
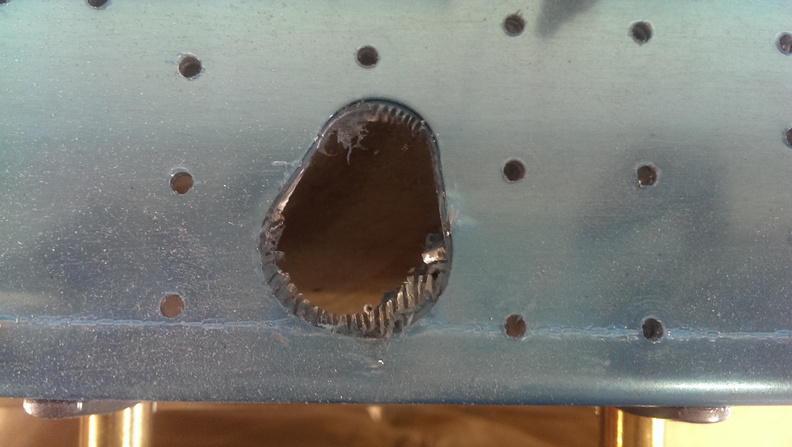
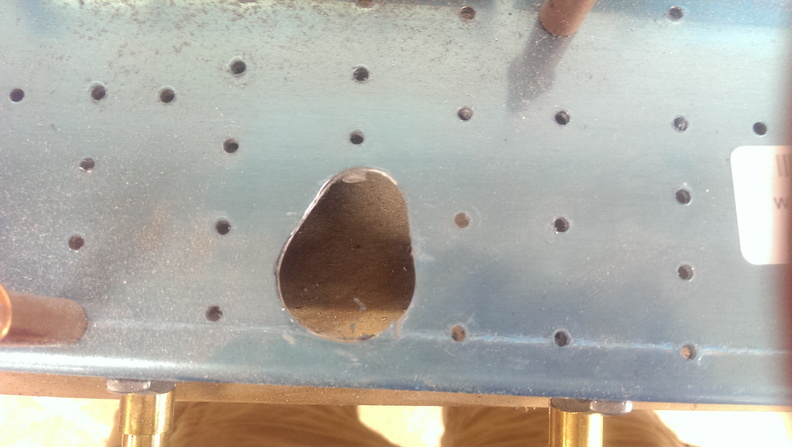
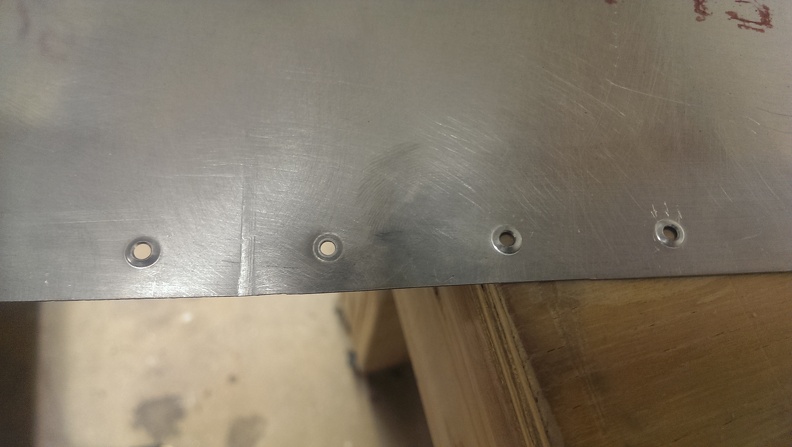
After that I dimpled the skin nice & easily. I also installed the 4 nut plates for the landing lights. This was a proceeded by a bath and prime. I also laid down 2 coats of chrome paint near the light hole.

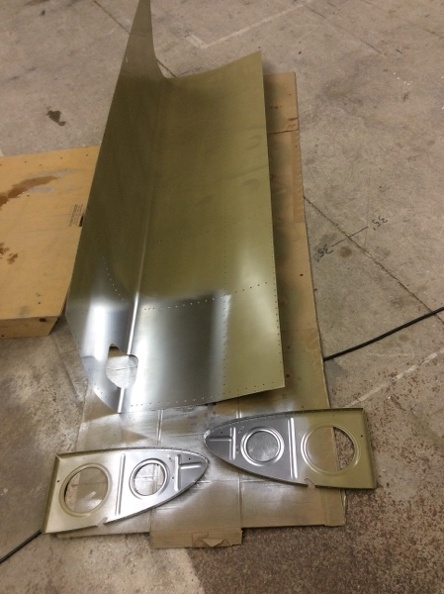
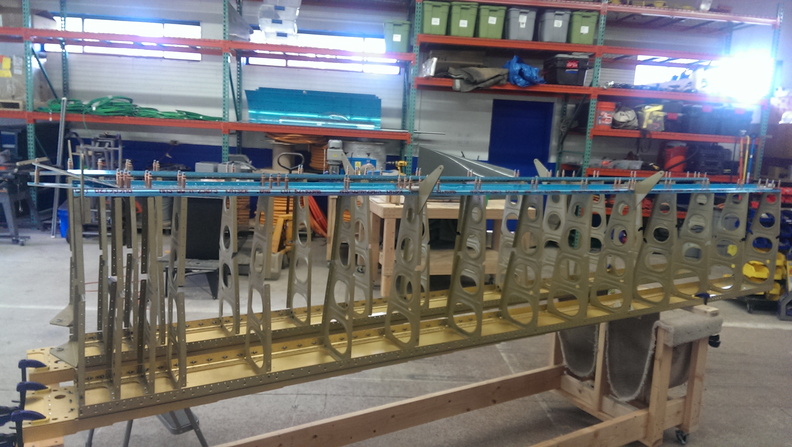
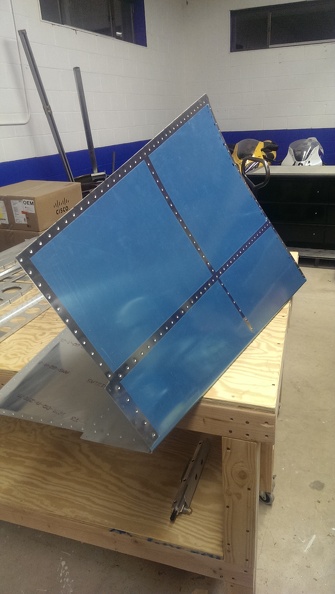
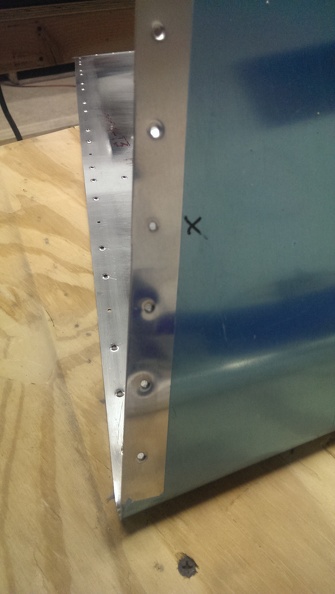
Since this stuff dries so quickly I was able to cleco together most of the leading edge. I also squeezed the 2 rivets for the stall warning hole which does not go in this side.

Tomorrow I plan on finishing up the fuel tank strip and riveting this part all together.

Rear spar Complete

Today I ran over to Home Depot and picked up some new Dewalt 20V Drills. I really did not want to buy any of the 20V stuff, but they stopped producing the one drill I needed in 18V. So I ended up getting the 20V 90d Angle Drill (tool only) and a combo kit that had a 1/4″ impact, drill/driver, 2 batteries, a charger and a bag. Once I got to the shop I immediately tested out the 90 degree drill and it did exactly what I needed it to do. I was able to drill out the conduit holes that I neglected to do earlier. This was followed up by tidying up the shop a little bit.

Next I grabbed the rear spars and mounted the doublers to them and began match drilling.  After match drilling one spar, I had to make a hole in one of the doublers match the spar. My solution was to use a unibit to take out a big chunk of the material and then dremel the rest out. With a cutting blade I cut out what i could. then i cut little notches to the edge. Next I used a dremel drum sander to smooth out the roughness.

next i mounted the spars to the ribs and matched drilled those

once that was completed I began disassembling and deburring, cleaning and priming. Once the primer was dry I cleco’d everything back together and began riveting.

Dimpling again

Today I recruited my sister Kaitlyn to help with some dimpling. After a few minutes I learned that wasn’t the greatest idea. She placed a nice dimple hole in the rear spar where there was not a hole previously. I pretty much lost motivation to continue on after that. Although this wasn’t a too bad of issue. I ordered a new part from vans at a whole $18.00.

On a side note I picked up a new soldering iron from radio shack today. Radio shack is clearly doing terrible as they tried to sell me a $10.00 replacement plan for it. I told the guy I was feeling risky today and I’ll take a chance without it.

First mistake

Today I received my DRDT-2 Dimpler. This thing is pretty bad ass. For those who don’t know, the sole purpose of this machine is to place little dimples in the aluminum so the rivets will sit flush. It does seem there is a divide in who likes it and who doesn’t. Personally I have ZERO desire to whack a hammer 3,283,394 times to get the perfect dimple. It’s getting covered in paint and I doubt there is enough of difference to justify it. The number one downside is its pretty easy to get on a roll while dimpling, more on that later.


After I got the table built, I began to start dimpling away at the Vertical Stabilizer skin. As fate would have it, With only 6 holes left to dimple, I dimple  a hole that should not be dimpled. While this on its own right was not the end of the world. I made it worse. I knew I wanted to use my steel back rivet plate so I had a hard smooth surface. But in a stroke of genius, I decided to use a bucking bar on top of the dimple with my rivet gun. This put a slight crease in the skin about 2″ long. I’m still on the fence if I should replace this.


I also picked up some SEM EZ Coat primer for long term protection. I had to order some Acid Etch and that will be in on Tuesday. But I gave a test run of 2 coats on some scrap and it looks pretty good. I’m not sure if I’m sold on the color yet though.


Tools & Toolbox kit

I had to go pick up my order from Plane Tools at the UPS Sort Facility in Watertown due to some sort of error, where my shipping town got listed at my billing town. Not the end of the world though. Isham had managed to pack alot of stuff into one little box. I was quite surprised what came out of there. Of course while unpacking I was so excited I didn’t take any pictures. After unpacking everything, I began the process of assembling the air tools. After the obligatory period of making noises with the various tools.

The next step of my adventure was to figure out how to make dimples with my pneumatic squeezer as my DRDT-2 has yet to arrive. That turned out to be pretty simple and soon enough i was a dimpling machine. After dimpling the edges, it was time to tackle some rivets. This I KNEW I was going to screw up. And it didn’t take long. After drilling out the first rivet, twice I decided to put the rivet gun down and try the squeezer. I ended up having much better luck with this, yet I know the rivets are not perfect. Next was the hinge, after match drilling both sides i decided to try back riveting. This was far easier than using a bucking bar. But I managed to over squeeze alot of rivets. I guess ill learn the timing eventually. The lower hinge I ended up using my squeezer again. Here is where I let it sit for the night. On Saturday I had flight school & a christmas party so nothing got touched.

Today, I came in and finished up the toolbox. The first thing I tackled was the AN470 rivets that hold the front stiffner on. You can tell which ones I used the rivet gun on and which ones I squeezed. The rivet gun ones look TERRIBLE. The latch is probably where I got my head out of my butt and figured some things out. When mounting the handle, I discovered the flow valve had more than 6 settings, which made me feel pretty dumb. Over all, the box looks good from far, but far from good up close. I’ll chalk this up to learning.

Next I started the Wing Kit. I didn’t really make it far in this as I don’t have my DRDT-2 yet. I got the stiffners cut, & deburred all the parts. That’s pretty much all I can do till next Friday.


First batch of Airplane tools!

I came back to my office from a quick road trip to find my box from Cleaveland Tools waiting for me. Everything except my rivet gauge and alignment punch came in. Not the end of the world though.

Back (From Left) 3M Cut & Polish Wheels (1″ & 2″), Mandrels for wheels, Cleaveland Tools 12″ Back Rivet set, Tight Fit Dimpling Tool, Edge forming tool, Rivet tape & dispenser, Cleco Pliers, Countersink Microstop, Scotch Brite Pads, & 24″ Ruler

Front (From Left) Aircraft Structural Technician book, 300 Silver clecos, Back Rivet bucking bar, and 16″ Back Rivet plate


More Tools!

Saturday I went to home depot & picked up a new belt sander / disc sander for some cheap $$$.  This of course meant I had to reorganize my power tool table.

I also picked up some metal blades for the band saw. I ended up having to return them due to the fact that homedepot.com lists the bandsaw with a 62″ blade, the box the band saw came in says 62″ blade. the owners manual says 59 1/2″ blade. The owners manual turned out to be correct. I also decided this week that since I had a desktop computer no one in the office was using that it would be moved into the shop. If you notice in the top corner of the picture you can see where I have my webcam mounted. I will be hosting Google Hangouts while I am doing any work on the build. Keep in mind I will be working on it whenever I have free time, so that could be right in the middle of the day or late at night. I also bought 2 chairs from Bed Bath & Beyond Expensive. They really were not to bad. I think they came out to about $70/after tax each.

Order updates:

YRC failed me yet again and couldn’t grasp the concept of a 2:00 PM pickup deadline. So instead of going out on Wednesday before Thanksgiving. It got picked up on Monday. I have a anticipated arrival date of Monday the 9th. I also placed my main kit order with Isham’s PlaneTools.com. According to Isham my order should go out early next week. Hopefully sooner than later. I also placed an order for various things from Cleaveland Tools. After I placed my order, I realized I wanted to add some more clecos & shot them a email. Annette responded first thing Monday and said no problem my order should go out today or tomorrow. Well they got it out about 5 hours later and today UPS notified me that there would be a early than scheduled delivery. Jackpot! Unfortunately I will be gone for tomorrow and Friday doing work things.

Workshop!

I’ve spent the last few days with some of my guys cleaning up the warehouse and building some EAA 1000 workbenches. I ended up building 4 standard tables (60″ x 24″ x 34″) as well as 4 mini tables at  46″ x 24″ x 34″. I had to cut the legs down 1″ from the plans due to my inability to read at Lowes. I had grabbed 2″ x 4″ x 92.5″ instead of 2″ x 4″ x 96″ sticks. Which was fine as the table was getting raised 3″ due to the wheels I added.


I felt I should comment on this specifically. The pipes holding the filter unit & air pressure regulator are standard 3/8″ NPT  Brass pipes from Home Depot. I believe they are 4″ long. The way I have this mounted, you are not going to find anywhere unless you work in the Wireless Construction industry. I used 2 trapezoids (3-Way Stand-offs), 2 7/8″ Stackable Cable Snap-ins, and 2 5/8″ Cable Bushings. I had to modify the bushings due to the short distance of the pipe, as well as remove some additional rubber inside. If anyone would like to use these, just let me know and if I still have any, I will send them to you.

The good thing about all these tables being moveable is I can place this bench where ever I wish. I need to change out the blade to a metal blade still. I have been debating on getting a benchtop belt sander / wheel sander combo. I don’t think I need one though. Its hard to tell but I have all the power cables going through a hole in the center of the table to a power strip mounted underneath. Very handy for sure.

The machine on the right is soley for work use. It is fantastic if you strip a lot of wire. We stripped a 55 gallon barrel of wire in less than a day with wire sizes ranging from 4/0 to #12.


David's RV-10 Build © 2015