Today I didn’t have much time to work on the skins. Corey helped me out again and we got one side of one skin completed.
Category: Empennage
HS Skin Riveting Pt 1
Today I started off by riveting the nose ribs. Corey gave me a hand with the center section ribs. Once we got that done we placed the front spar and began to rivet it. I could have done this solo, but having a helper makes this so much easier. At one point Dad & Jason showed up and they also helped out in riveting the skin to the front spar. After getting all the rivets in the spar I began riveting the rest of the ribs in place on the spar wit LP4 rivets. I also secured the end rivets with some AN470-4-? rivets. After that I just cleco’d everything in place so it will be lined up for tomorrow.

Corey (L) and Me (R)

Primer & Assembly
Today I went to work on priming everything. This was done in 2 sessions as I broke it up for dinner.
Next I began riveting the stiffners together and the to the stringer web. My squeezer did not fit so I had to use the rivet gun. I can definitely tell I still have a bunch of work on my rivet gun skills. After that I mounted the assembly to the front spar.

After I riveted everything to the spar I mounted the cradles I made and set the skins in them. I cleco’d the nose ribs in and called it a night. I will have help available tomorrow to help me rivet the skins

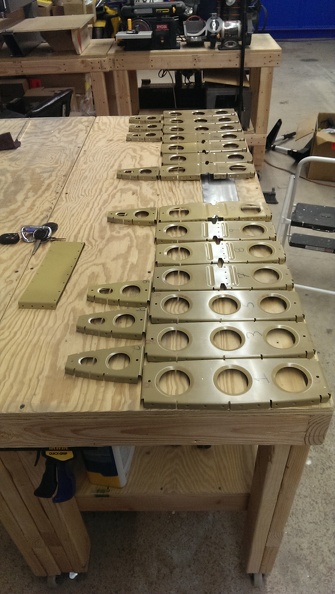
More Dimpling & Countersinking
Today I finished dimpling the skins and the ribs. After that I followed it up with countersinking the spars and the stiffeners. I got bored at one point in time so I counted the holes. 952. 952 holes. 952 clecos in and out, 952 holes to drill, debur, dimple or counter sink. Good times. Tomorrow as long as nothing comes up, I will be priming and maybe start some riveting.
Sanding & Dimpling
Today I sanded all the parts that I had available. The ability to use my palm sander made it a million times faster. I also ordered a bunch of red scotch brite pads from amazon as well. That is the only down side of the palm sander is it tears the pads up pretty quickly. After sanding I dimpled one of the skins for the horizontal stabilizer. I can’t stress about how there is a lot of holes in this thing. One step at a time though. No pictures tonight.
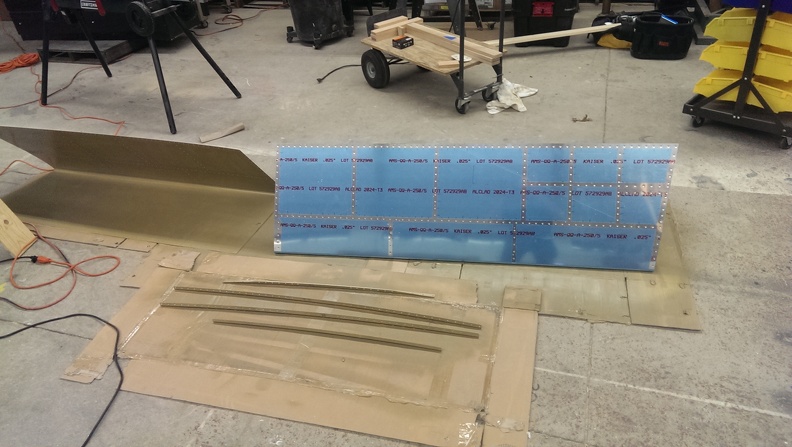
Match Drilling & Disassembly
Today I finished the other half of the Horizontal Stabilizer. Once that was completed I disassembled everything. It’s so amazing how compact this part is when its disassembled. After dreading scotch briting the entire surface, I discovered that my palm sander will hold a scotch brite pad pretty well. This led to the next problem, Electricity. This would be far easier if I had a drop cord.

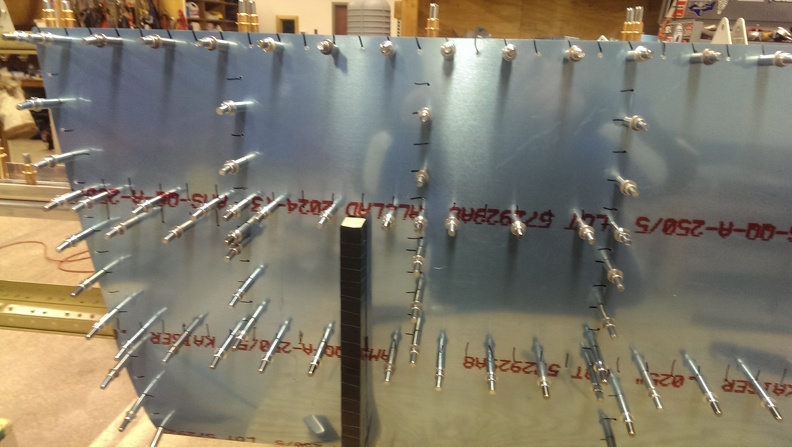
Match Drilling
Today I matched drilled one side of the horizontal stabilizer. I don’t think a sane person can do both sides in one sitting. To keep track of which holes I drilled, each one got a little black stripe from a sharpie
Ran out of Clecos!


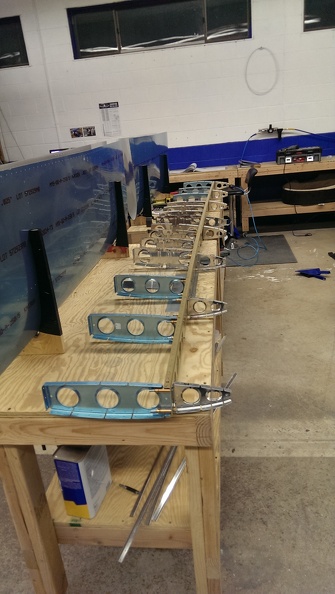
Front Spar Construction
Today I primered & assembled the Front HS Spar. I did learn a valuable lesson here that I will probably forget. But its basically, If there is another tool, its probably the right tool. The adjustable set holder for the rivet squeezer is pretty much at its max for a -9 rivet. But I got into my rhythm I forgot I had my rivet gun that I could use. Had I used this, I think this would of gone far easier on the -9 and -10 rivets.

Nezr I added the various ribs to the spar and matched drilled as neccessary
Me cleco’ing

Nice pretty rivets, I bet you can’t tell without looking at my other post which holes I fixed

Countersink Fix
After letting the ol JB Weld cure for several days, I ground down the excess and it came out really well. I forgot to take a post drill/countersink photo but its not bad at all. I didn’t have any other time today to work on the plane
